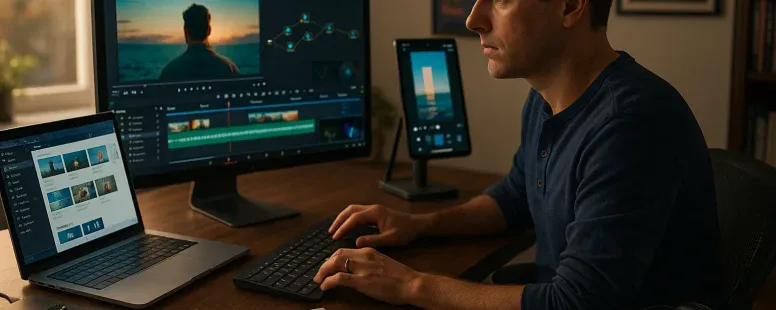
CapCut changed how many people edit short video: it’s free, mobile-first, and packed with templates. But you might need a different tool because you want desktop power, better color tools, team features, or fewer watermark surprises. This guide names the best alternatives to CapCut, explains what matters when you pick one, and helps you move projects without losing hours of work. Expect clear comparisons, concrete examples, and honest trade-offs so you can choose fast and get editing done.
What To Look For When Choosing A CapCut Alternative
Fact: Your choice should match your goals, quick social clips, cinematic projects, or team workflows. Before you test apps, list the features you use in CapCut: multi-track timelines, motion tracking, auto captions, aspect ratio presets, and cloud sync.
Start with these criteria and weigh them: technical power, ease of use, platform, price, export quality, and available templates. If you need precision, prioritize advanced color grading and node-based compositing. If you post daily Reels or Shorts, prioritize mobile speed, presets, and direct upload to Instagram or TikTok.
Semantic entities to check: DaVinci Resolve (color), Wondershare Filmora (templates), VN / VlogNow (mobile + desktop sync), InShot (social apps), KineMaster (mobile layers). Ask yourself: will you edit on phone, tablet, or desktop? Do you need team access or local-only projects? How often will you export in 4K? These answers reduce choices quickly.
Vulnerable note: I once switched teams and found our “easy” CapCut templates didn’t translate to desktop, we lost custom fonts and spent a day rebuilding titles. Plan for that risk before you commit.
Top Alternatives: Side‑By‑Side Profiles
Fact: Each edit app excels at one or two things: no single tool is perfect for every user.
DaVinci Resolve, Best For Advanced Editing And Color Grading
DaVinci Resolve from Blackmagic Design gives you professional tools for free. You get node-based color, Fairlight audio, and Fusion effects. Use it when you need film-level grading, multi-cam edits, and high-res deliverables. It has a steep learning curve but industry-grade output. Real-life example: an indie filmmaker used Resolve to turn flat cellphone footage into a cinematic short with accurate skin tones and consistent LUTs.
Filmora, Best For Beginner‑Friendly Desktop Editing
Fact: Filmora simplifies common edits without hiding useful controls. Filmora offers drag-and-drop motion presets, a large stock library, and clear export options. You get more polish out of the box compared with CapCut’s templates, and it runs well on midrange Windows and macOS machines. Many creators pick Filmora when they want faster learning and predictable results.
VN (VlogNow), Best Free, Mobile‑First Editor With Desktop Sync
VN gives you a mobile workflow that matches a desktop app. It keeps familiar gestures, unlimited tracks, and decent effects. VN’s strength is project portability: you can start on iPhone or Android and finish on the VN desktop app. If you move often between devices, VN saves time.
InShot, Best For Quick Social‑First Clips On Mobile
Fact: InShot focuses on speed. You load footage, trim, add a music track, resize to 9:16, and export, all in minutes. InShot lacks advanced color tools, but it serves influencers who publish multiple daily updates. It’s light, reliable, and integrates with phone galleries.
KineMaster, Best For Mobile Power Users And Layered Edits
KineMaster brings multi-layer editing, chroma key, and frame-by-frame precision to phones and tablets. It supports precise masks and complex layering that CapCut sometimes hides behind templates. If you edit on an Android tablet or an iPad and you rely on layered compositions, KineMaster gives you control. Note: the free tier adds a watermark: the premium tier removes it and unlocks assets.
Side‑By‑Side Comparison: Features, Performance, And Value
Fact: Comparing features side-by-side reveals practical trade-offs you can’t see in app store screenshots.
Each app handles captions and aspect ratios differently. CapCut-style auto captions are present in Filmora (paid) and some mobile versions of VN: InShot requires manual captioning or third-party tools.
Performance And System Requirements
Fact: Mobile-first apps run on mid-range phones: DaVinci Resolve requires a beefy desktop. If your machine has less than 8GB RAM and an integrated GPU, avoid heavy Resolve projects. Filmora and VN run acceptably on 8–16GB systems: KineMaster and InShot are optimized for modern phones.
Pricing, Plans, And Licensing Considerations
Fact: Free tiers exist, but they carry limits. DaVinci Resolve has a fully functional free version: DaVinci Studio is paid for advanced features. Filmora uses subscription and perpetual licenses. VN and InShot are freemium with optional subscriptions to remove watermarks or access stock assets. KineMaster subscriptions unlock full export and asset stores.
Think about licensing: if you use stock music or footage, check commercial rights. Filmora Marketplace and KineMaster Asset Store both offer licensed packs: DaVinci relies more on third-party purchases.
Platform Availability And Export Options
Fact: Not all apps export the same codecs or bitrate control. Resolve exports ProRes, DNx, and industry codecs on desktop. Filmora exports H.264/H.265 with decent bitrate control. VN and InShot offer social-ready presets (TikTok, Instagram), but they may compress aggressively. If you need broadcast delivery, pick Resolve or export from Filmora with higher bitrates.
How To Choose The Right Alternative For Your Use Case
Fact: Your use case narrows the field quickly. Match the tool to the job and your hardware.
Casual Social Creators And Short Clips
Choose InShot or VN when you value speed, presets, and direct uploads. InShot shines for fast edits and story-sized clips. VN fits creators who switch between phone and laptop. Tip: keep a template library in the app to reuse intros and lower-thirds.
Aspiring Filmmakers And Advanced Editors
Choose DaVinci Resolve. It gives you professional color, audio mixing, and compositing. Expect a learning curve: plan time for tutorials from Blackmagic Design and real projects. Example: a student shot a short on a smartphone and used Resolve to color-match three locations and export DCP-ready files for festivals.
Small Businesses, Marketers, And Content Teams
Choose Filmora or KineMaster depending on workflow. Filmora helps teams that need branded templates and stock assets with simpler onboarding. KineMaster fits small teams that work from tablets and need layered assets and precise control.
Consider team features: Filmora’s cloud and asset sharing reduces repeated work. If you need native cloud project collaboration, check VN’s desktop sync and third-party solutions like Dropbox or Google Drive to share project files.
Tips For Migrating Projects From CapCut And Preserving Workflow
Fact: You can’t open a CapCut project directly in most editors: you must export and rebuild selectively.
Exporting From CapCut And Importing Into Another Editor
Export clean stems: render a master video, but also export separate audio tracks when possible (dialog, music, SFX). If CapCut supports project export (some versions do), use that to preserve cuts. Otherwise, export high-quality MP4 or MOV at source resolution and import into the new editor. Use consistent file names and a simple folder structure to avoid confusion.
Recreating Key Effects, Templates, And Aspect Ratios
Start by listing critical elements: transitions, custom fonts, overlays, and aspect ratios. Recreate aspect ratios first, 9:16, 1:1, 16:9, because they affect motion and framing. For effects, identify whether they rely on keyframes, masking, or AI filters. Sometimes you can’t match an AI filter exactly: aim for a similar visual using LUTs in DaVinci Resolve or presets in Filmora. Keep a screenshot reference for each effect to speed rebuilding.
Streamlining Your Workflow: Shortcuts, Presets, And Cloud Sync
Create presets for your most-used settings: export templates, title styles, and color LUTs. Import LUTs into Filmora or Resolve to keep a consistent look. Save keyboard shortcuts that match your prior workflow: you can remap hotkeys in Resolve and Filmora to keep muscle memory. Use cloud sync, Google Drive, Dropbox, or the app’s built-in sync, to keep project files available on multiple devices.
Caveat: rebuilds take time. Expect 1–3 hours per project when moving from CapCut to a different platform for the first time. That time shrinks after you’ve created presets and a migration checklist.
To provide the best experiences, we use technologies like cookies to store and/or access device information. Consenting to these technologies will allow us to process data such as browsing behaviour or unique IDs on this site. Not consenting or withdrawing consent, may adversely affect certain features and functions.
Functional
Always active
The technical storage or access is strictly necessary for the legitimate purpose of enabling the use of a specific service explicitly requested by the subscriber or user, or for the sole purpose of carrying out the transmission of a communication over an electronic communications network.
Preferences
The technical storage or access is necessary for the legitimate purpose of storing preferences that are not requested by the subscriber or user.
Statistics
The technical storage or access that is used exclusively for statistical purposes.The technical storage or access that is used exclusively for anonymous statistical purposes. Without a subpoena, voluntary compliance on the part of your Internet Service Provider, or additional records from a third party, information stored or retrieved for this purpose alone cannot usually be used to identify you.
Marketing
The technical storage or access is required to create user profiles to send advertising, or to track the user on a website or across several websites for similar marketing purposes.